Azure Frugality
There is a certain discipline and creativity that comes from having to spend your own money. This post summarizes some tips and tricks for those learning about Azure and looking to do some hands-on and self-funded experimentation. I started this post while studying for an Azure exam, so it is geared towards sampling and administering as wide a range of services and features as possible while keeping costs down.
These recommendations are not meant for production environments, (although some might still be useful in a production environment) as I’m not giving much attention to performance. The recommendations apply best to development or lab environments with intermittent usage.
Subscription Options
Pay-as-you-go is likely your best option, unless you have a Visual Studio subscription or other avenues such as those available to students.
There are a number of Azure free trials, especially an initial free account with a number of credits you can use in the first 30 days and a collection of services you can use for free for up to a year. Beyond that initial free trial, you’ll find many subscriptions and features (e.g., Azure Premium) have 30-day trials, as well. Once you’ve used up your free trials you are then into strategically choosing and using resources in the most economical way.
Even if you work for a company that uses Azure and you could technically experiment within that environment, I recommend you use your own personal subscription. It’s not worth the risk of messing something up in your corporate environment, and you’ll feel a lot more freedom and comfort working in your own subscription.
Budgets and Alerts
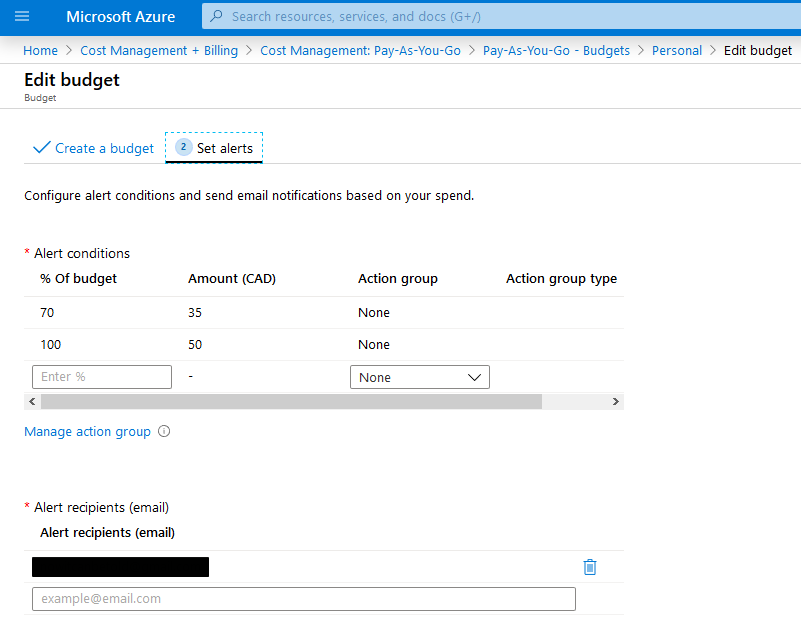
Set up a budget with one or more cost alerts. Unfortunately Microsoft does not let you set hard limits for pay-as-you-go subscriptions to automatically stop cost accumulation (you can see which subscriptions support spending limits here).
In my case I have a spending limit of $50 (Canadian dollars) , with two alerts set up that will go to my email address:
Monitor and Analyze Costs
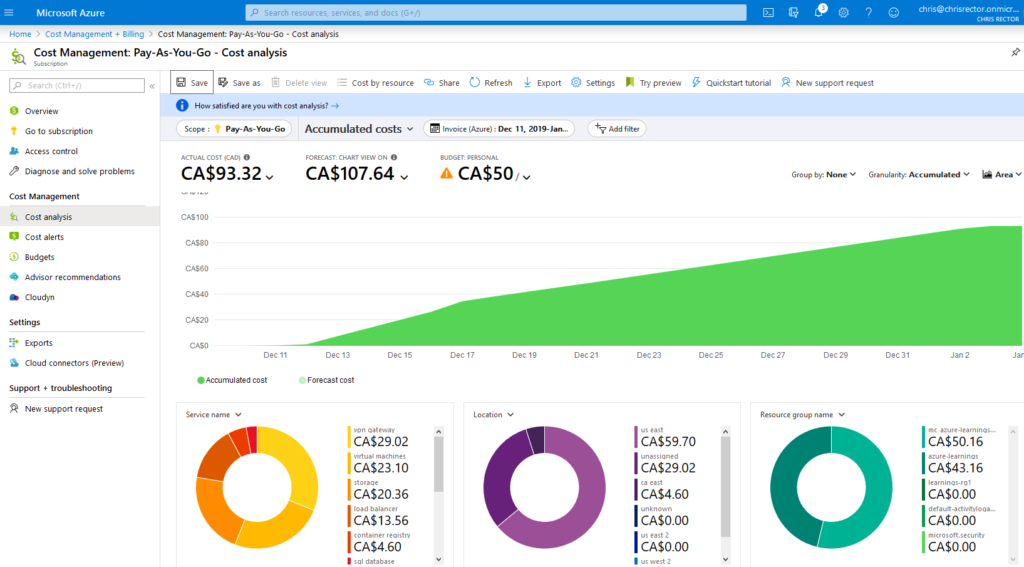
Monitor and analyze your costs regularly using Cost Management. The cost analysis graph gives you a quick view of your current and predicted costs, along with a breakdown by resource, location, and resource group. You’ll want to check it more frequently when you first start out until you get comfortable with Azure so that you can act on any costs that are accumulating faster than you anticipated. After a few weeks you can check less frequently and rely more on the alerts you have configured.
Recommended VM Types
I recommend the “burstable” B series VMs for experimentation. They are designed to be cost effective in that they can lay idle for most of the time, then burst up to 100% capacity (and incur cost) when needed. They cost little while they lay idle and this is well-suited to using them for exploration and experimentation.
Standard_B1ms gives you 1 vCPU and 2G of RAM and gives you a lean option that can still let you run a server OS. Don’t expect performance, but its monthly cost is estimated to be around 20 USD and there are few options that cost less. Also, the 2G of RAM is the minimum amount required to let you use disk encryption (encrypting Linux OS disks requires 8G of RAM, but you’ll be able to encrypt Linux data disks with 2G).
I’ll mention A-series as another affordable option if you have something in mind that requires more sustained resource usage but note that A-series VMs don’t support disk encryption. That ruled them out as an option for me as I’m primarily interested in cyber security.
Also note that not all VM types are available in all regions, so you may need to change your region to get access to some of the more affordable types. Most major regions will have them, but others do not (Canada East does not offer them, for example).
Limiting Available VM Types
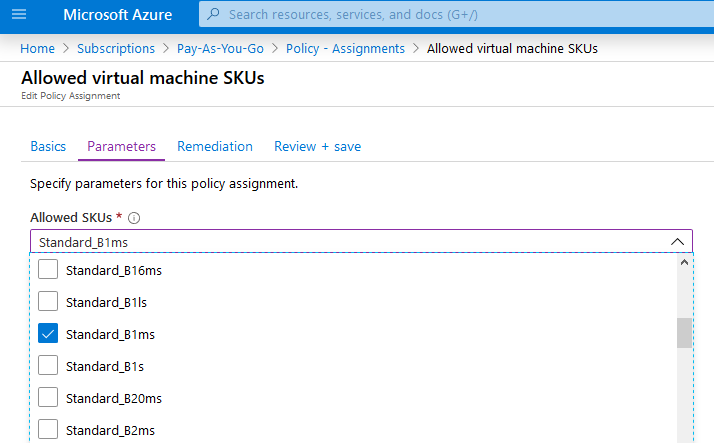
To avoid accidentally provisioning a beefy and expensive VM, configure a policy on your subscription to limit the available VM types. It may be unlikely that you’d choose a pricy VM, but this is simple to set up and ensures you keep to the VM types you can afford.
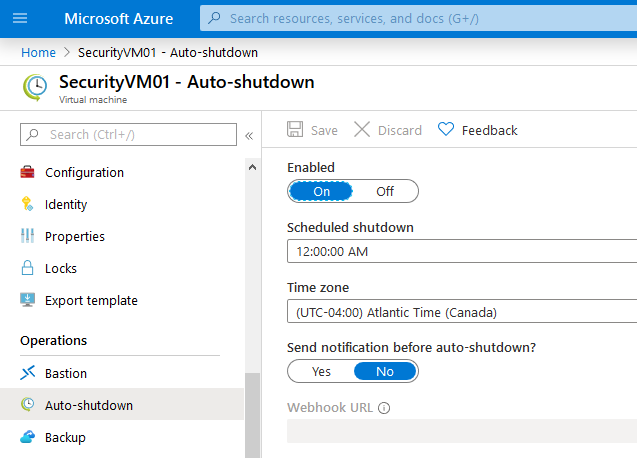
VM Auto Shutdown
Configure your VMs to turn off at a set time each night, so they’ll turn off even if you forget to shut them down.
Group Resources for Easy Deletion
Use resource groups to group together resources in cases where you are doing a more complex setup that involves several resources that you don’t need to keep long-term. For example, if you are exploring how to connect VNets you might configure several VNets, VMs, and other resources. Kubernetes is another area that requires several different resources and lends itself to grouping. Having them grouped together in a resource group specific to the experiment your running will let you keep them separate from other resources you want to keep longer term (e.g., key vaults or storage services). This way resources are easily deprovisioned when the experiment is over.
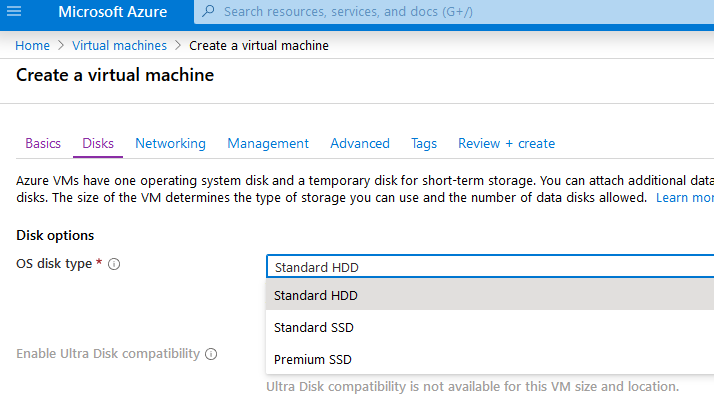
Use HDD storage
The Azure Portal will default to premium SSD – select standard HDD instead to save a bit of cost.
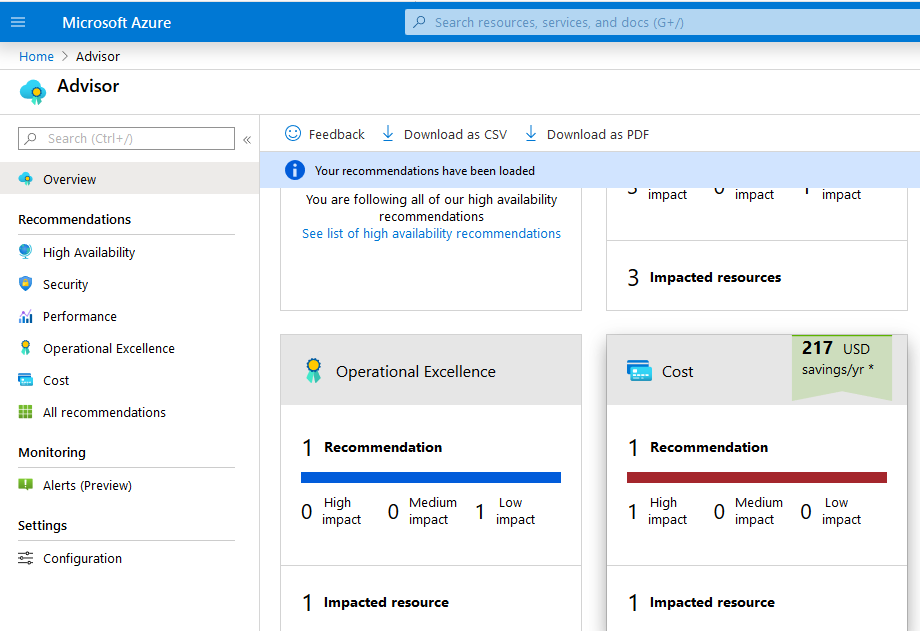
Review Advisor Recommendations
Check your cost recommendations in Advisor from time-to-time, although if you are using Azure intermittently you may not find these recommendations that useful. My sense is that Advisor works best when it has a good amount of relatively stable usage data to work with, which is likely not the case in a development or learning environment.
Things to Use Sparingly and Watch Closely
This is by no means an exhaustive list, but these are a few things I’ve noted that can add cost to your bill if they aren’t monitored closely. These are not necessarily expensive on a per-unit basis but might be billed continuously for the time they are configured and not based on resource usage.
VPN gateways
These are billed “based on the amount of time that gateway is provisioned and available” (see here for the current pricing list). I did not read this carefully the first time and I assumed billing would be based on the amount of data I put through the gateway. The least-expensive tier is estimated to cost 34 USD/month and so this can add up if you have it continuously available.
Storage
As you probably expect, storage is billed based on the amount of data you keep. If you set up automatic storage of audit log data, you can find your data volume creep up along with the associated costs. Periodically cleaning out log data (or whatever data) that you no longer need will help keep these costs down.
Load Balancers
Basic load balancers in Azure are free but standard load balancers are not and have charges that include per-hour per-rule charges that you will incur regardless of how much data flows through the load balancer. The costs are modest if you have a couple of load balancer rules and minimal data flowing through it, but you should be aware that the per-rule costs keep adding up even when you are not using it.
If you are setting up a Kubernetes cluster using the Azure Portal, you are only given the option for a standard load balancer. You can set up a cluster using a basic load balancer via CLI, but you must read a bit of fine print to be aware of this.
Summary
I hope you find some of these tips useful and please let me know if there are any I missed that you’d recommend adding. There is quite a bit you can do in Azure without spending a ton if you are nimble and you keep a close eye on your costs (especially when you first start using Azure). I think the exercise of trying to keep your costs down, even on such a small scale, gives you a perspective you won’t get in a large corporate environment where you may not have the same visibility into what drives Azure costs.